Working with scheduler
List of key features and how to work
In the daily work of an administrator or employee, having all tools available in one place is always an advantage
Let us look at the key features of the Scheduler screen
Useful buttons and links
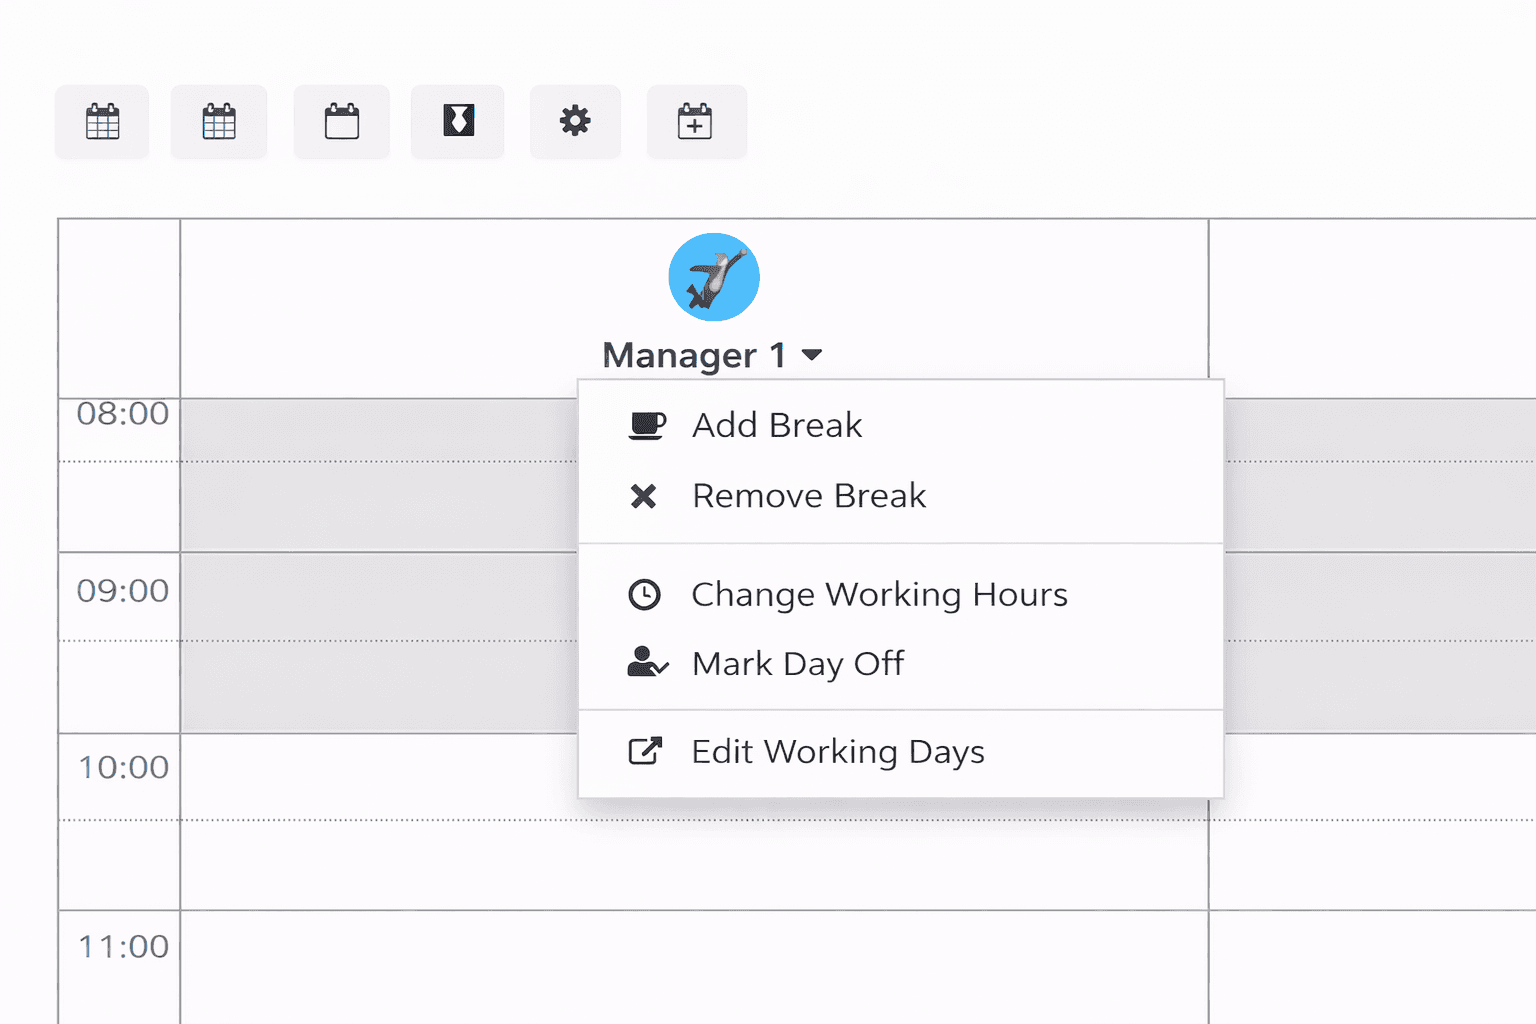
Buttons from right to left:
- Weekly schedule
- Daily schedule
- Add an employee to the scheduler
- Display settings (each user configures individually)
- Add an event
Actions on each resource:
- Add a break for the current day
- Remove one of the breaks
- Change working hours for the current day
- Set a day off (remove from the scheduler)
- Go to the working hours management screen
Time navigation
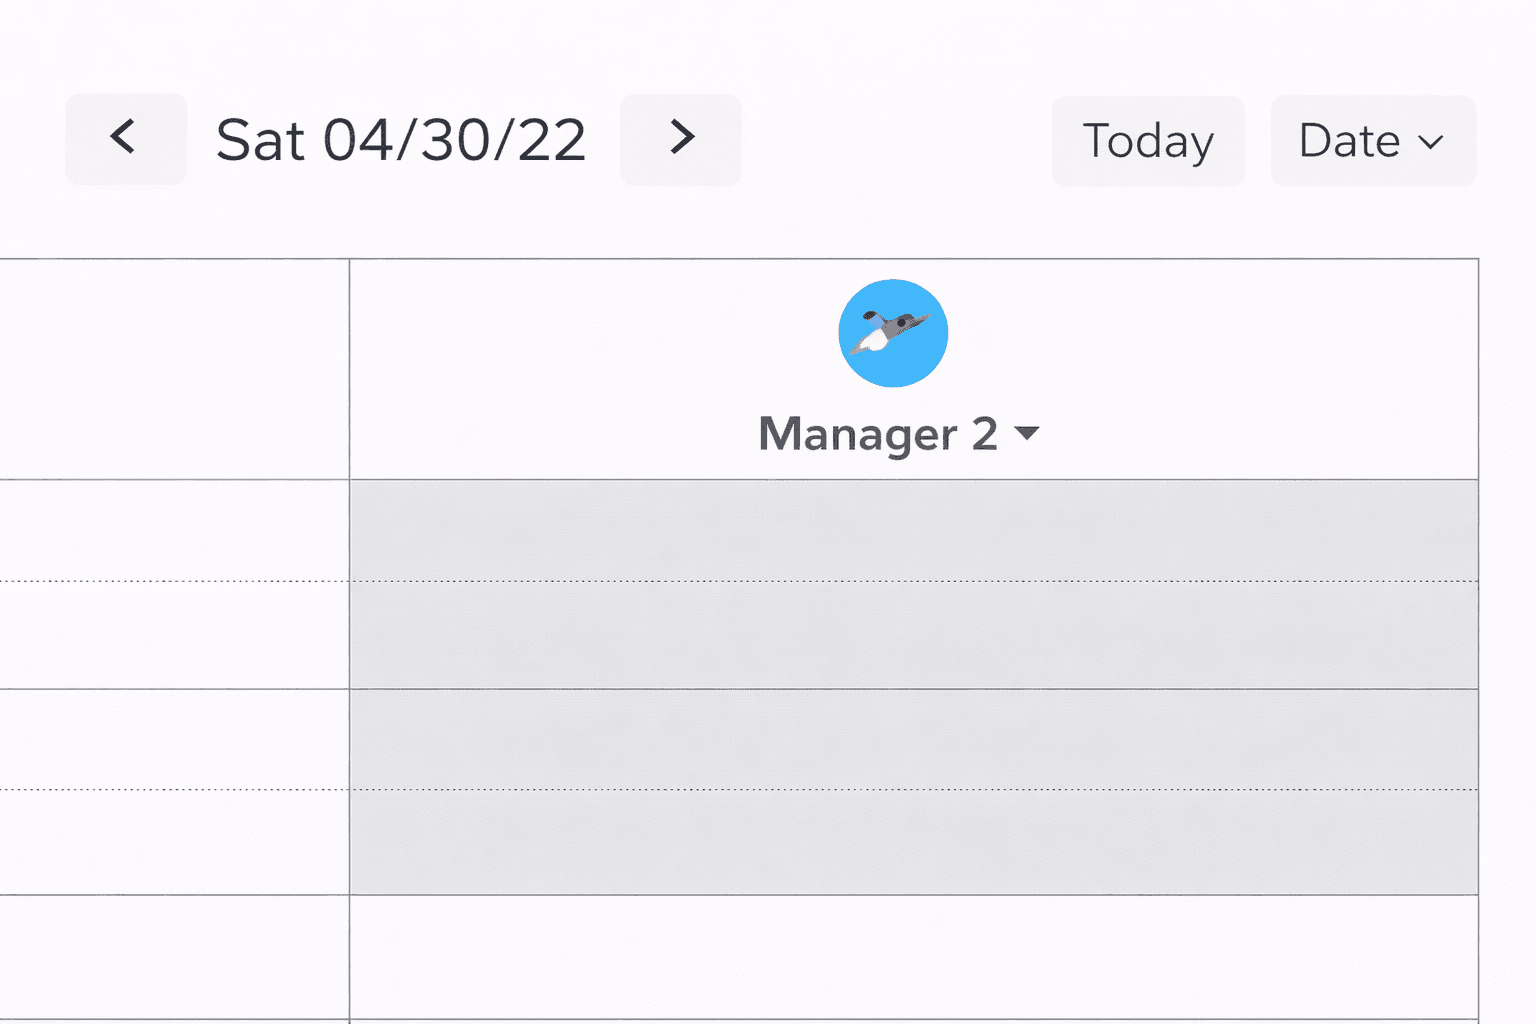
- Navigate between days (right / left)
- Quick jump to Today
- Navigate to a specific date
Appointments on the scheduler
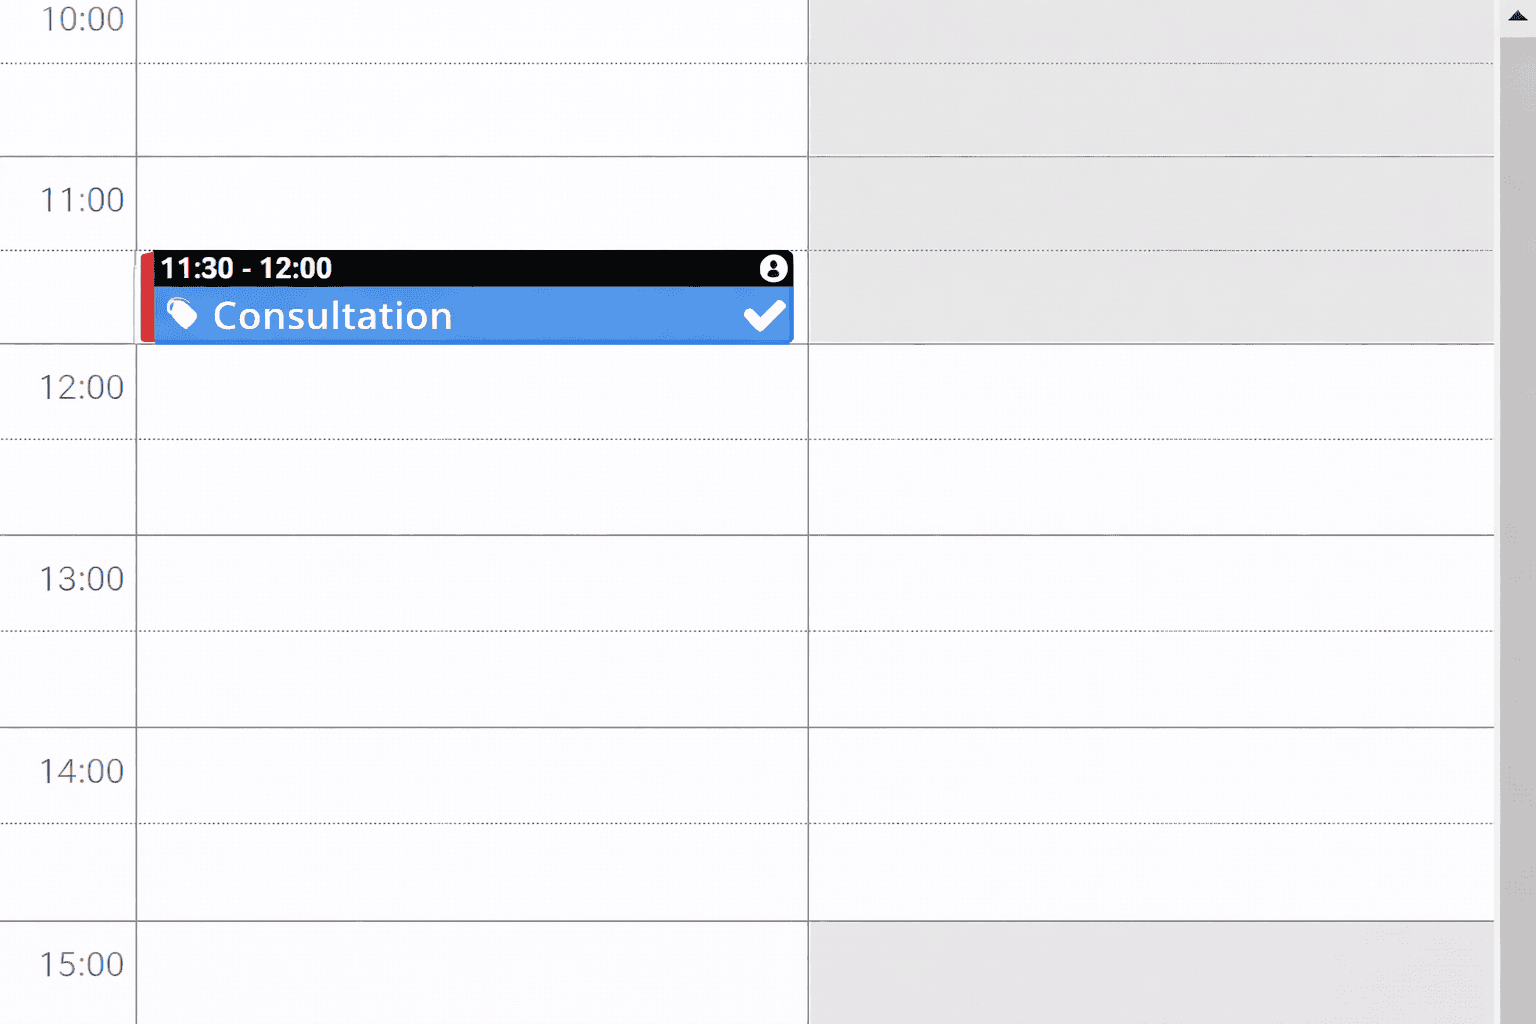
- Detailed information when hovering over the (i) icon
- Appointments can be moved in time and between resources (if they provide the corresponding service)
- Stretching an appointment in time
In appointment details
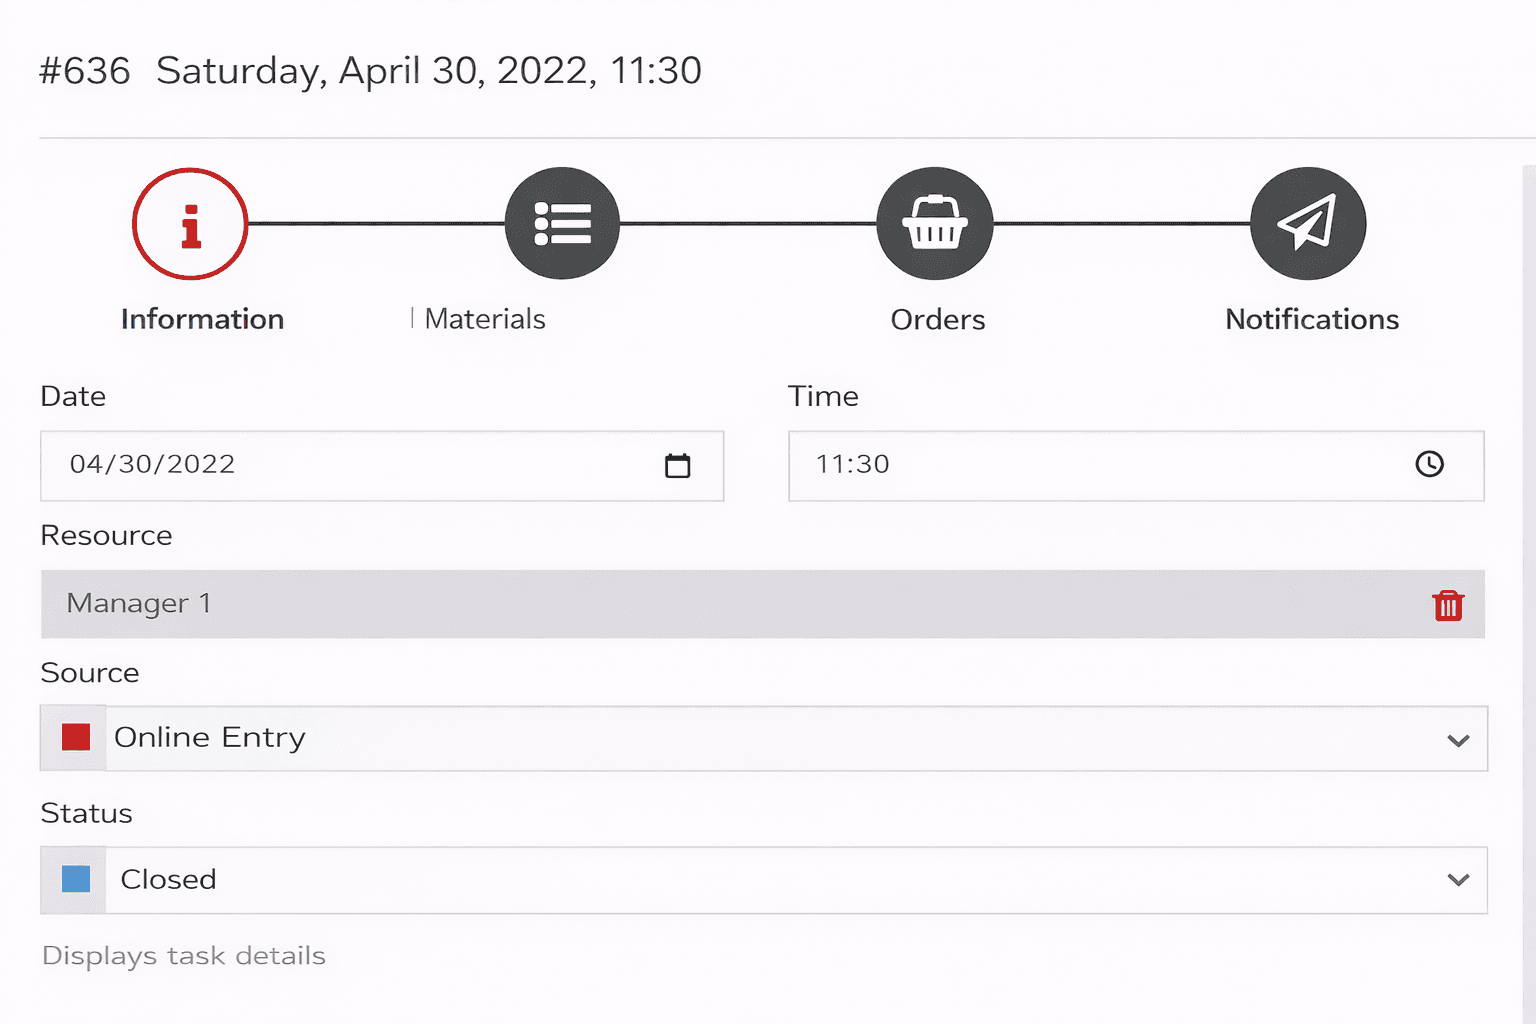
- Number and start time
- Switcher between appointment details
- General information
- Adjusting consumable materials
- Creating related Orders (product sales)
- Quick messages and automated mailing history
- Editing start time and resource
- Managing the appointment source (extendable through settings)
- Managing the current appointment status (extendable through settings)
- To delete an appointment -- simply change the status to Cancelled or another status that does not occupy time in the scheduler

- Client section
- Quick call
- Statistics and links
- Edit client data
- Remove client (replace with another or create a new one)
- Using memberships and usage statistics
- Configuring notifications for an individual appointment
- Cash register through which payment was processed
- Adding services and adjusting their parameters